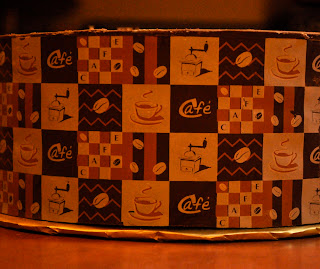
Chocolate cake wrapped lovingly in dark chocolate
I love this cake! It was made for my sister's birthday. I'm also really loving chocolate transfer sheets! When making non-fondant type cakes they are great for adding that little extra 'something' to your decadent creation!
My sister kindly took some photos of various stages of the chocolate process as I was making it. (nothing like putting the cake recipient to work!!!). The lighting in my kitchen is terrible (much to my sister's frustration), so please excuse the poor lighting in these photos...!
I decorated an 8" round cake and covered it with chocolate ganache. And then the fun began...!
How to make this cake:
Determine the height and circumference of the cake.
I measured my ganached cake to see how high it was, and then added a little extra height so that it came slightly above the top of the cake. Easiest way to measure the circumference is to take the transfer sheet and wrap it around the cake pan used to bake the cake...(On those nights when I'm tired and up late decorating, mathematics is not my thing...!!) Add a little extra length so you don't end up falling short.
Lay a piece of parchment paper (or wax paper) down on your work surface.
Lay the transfer sheet on top of the paper, textured side up. Adhere the transfer sheet to the paper with some melted chocolate or icing. You don't want your transfer sheet sliding around while you spread the chocolate, so put tiny bits of icing/chocolate every 4" or so along the parchment and on each corner of the parchment.
Important note:
Mark the corners of your transfer sheet on the parchment/wax paper with a pen. Because your chocolate will spill over the transfer sheet area, you will need to know where to make your cuts and the transfer sheet will be hidden below the yummy melted chocolate.
Melt chocolate
(30 second increments in the microwave, stirring between each)
Pour melted chocolate onto transfer sheet and spread evenly.
You'll want it reasonably thick when wrapping around the cake so that it isn't too brittle.
Wait for chocolate to harden slightly.
When making chocolate panels, you will let the chocolate fully harden (you can speed this up by putting it in the fridge for a few minutes). However, when doing a wrap, you will keep your chocolate on your work surface and keep a watch on it until it is firm enough to cut/trim, but still soft enough to wrap around your cake without breaking. It only took approx. 7 mins on my counter, so be sure to watch it closely.
My apologies here...with 2 screaming toddlers we dropped the ball on photos for this part!!
Trim excess chocolate and get ready to wrap!
(this is where the marked parchment is important to guide you).
Gently pull up one end of your transfer sheet, carefully removing it off the parchment paper. Hold length of transfer sheet in both hands.
Wrap
Place one end of the transfer sheet against the side of your cake, pressing the chocolate to be wrapped against the ganached cake. Wrap your cake by slowly turning it and pressing the chocolate against the ganache as it turns. Be sure to check that the bottom of your transfer sheet is even with the bottom of your cake. You will likely need to trim the extra chocolate/transfer sheet to make your two ends line up. Once wrapped, tape the outside of the transfer sheets where the ends meet. This will keep your wrap in place until the chocolate has fully hardened.
Put in fridge for a good 20-30 minutes so that chocolate is fully hardened.
Remove transfer sheet.
Remove cake from fridge. Take tape off, and gently begin to peel one end of the transfer sheet away from the chocolate. Turn cake slowly as you peel, until all of transfer sheet is removed. You should now have a beautiful design on the outside of your chocolate!
Decorate your cake!!
For this case, I used vanilla buttercream swirls and added leftover bits of chocolate that I cut in triangular shapes from the transfer sheet.
Voila!


No comments:
Post a Comment